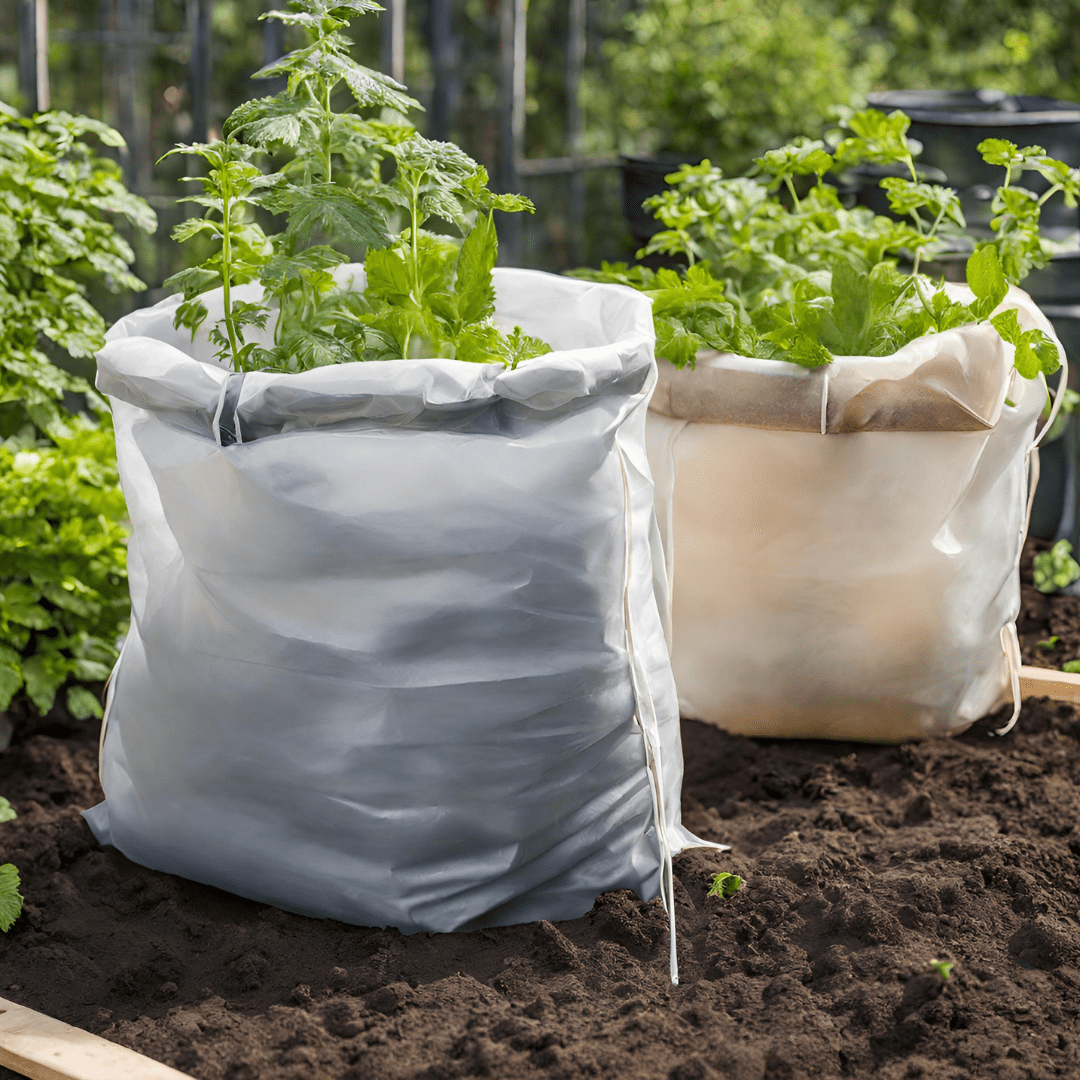
Gardening in grow bags is a simple way to begin gardening almost anywhere. Pick up a few bags, fill them with soil, and you’re ready to go.
It’s easy to see why grow bag gardening is becoming popular for new gardeners and gardeners looking to add more space to their gardens.
Advantages of gardening in grow bags
Grow bag gardening offers numerous advantages for both novice and experienced gardeners alike. Here’s why they’re not only convenient but also beneficial for your plants’ roots:
-
Improved Drainage: Grow bags provide excellent drainage, preventing overwatering and ensuring that excess moisture drains away efficiently. This helps to avoid soggy soil and root rot, promoting healthier root development.
-
Enhanced Root Oxygenation: Unlike traditional containers, grow bags allow plant roots to breathe. The breathable fabric promotes air circulation, oxygenating the roots and fostering optimal growth. Healthy roots are key to the overall well-being of plants, resulting in stronger, more resilient growth.
-
Easy Mobility: One of the standout features of grow bags is their portability. You can easily move them to different locations based on your plants’ sunlight requirements. Whether you need to chase the sun in cooler climates or provide shade in hotter regions, grow bags offer flexibility for optimizing growing conditions.
-
Cost-Effective and Space-Saving: Grow bags are an affordable and space-efficient gardening solution. They provide an inexpensive way to expand your growing space without the need for bulky containers or raised beds. Plus, when not in use, grow bags can be easily cleaned, folded, and stored, making them a practical choice for gardeners with limited space.
Overcoming Challenges: Solutions for the Disadvantages of Grow Bag Gardening
While grow bag gardening offers many benefits, it’s essential to address some common challenges that gardeners may encounter. Here are solutions to overcome the disadvantages of gardening in grow bags:
1. Increased Watering Needs:
Grow bags have a tendency to dry out more quickly than traditional pots, requiring more frequent watering. To combat this issue, especially for thirsty plants like tomatoes and squash, opt for grow bags with built-in watering reservoirs or incorporate an olla (clay pot) into the grow bag. These solutions help maintain moisture levels and reduce the need for constant watering.
2. Difficulty in Moving Large Grow Bags:
Larger grow bags can pose a challenge when it comes to mobility, especially when filled with soil. To make moving grow bags easier, select high-quality bags with sturdy, heavy-duty handles. Additionally, enlist the help of others when relocating filled grow bags and ensure you’ve chosen the right location before filling them with soil to avoid unnecessary hassle.
3. Increased Fertilization Requirements:
Similar to other container gardening methods, plants grown in grow bags may require more frequent fertilization compared to those in raised beds or in-ground beds. To ensure your plants receive adequate nutrients, use a half dose of liquid fertilizer every few weeks during the growing season for most crops. This regular fertilization regimen helps replenish nutrients in the grow bag’s limited soil volume, promoting healthy growth and optimal yields.
By implementing these solutions, you can effectively address the disadvantages associated with gardening in grow bags, ensuring a successful and rewarding gardening experience. With proper care and attention, grow bag gardening can yield impressive results, allowing you to enjoy a thriving garden regardless of space constraints or environmental challenges.
5 Tips for Successful Grow Bag Gardening
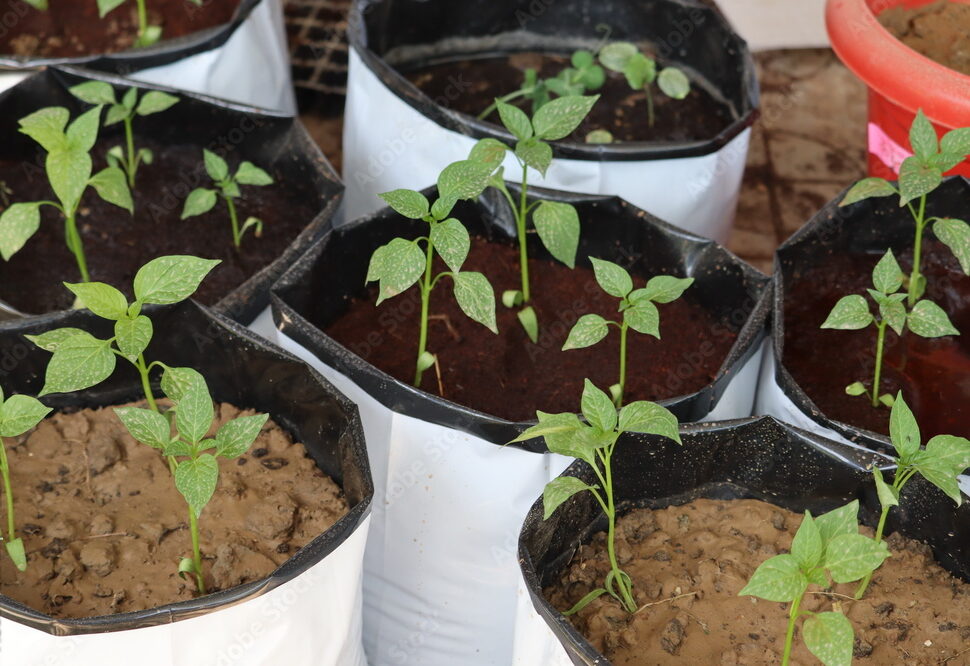
Grow bags offer a versatile and space-saving solution for gardening, but choosing the right plants is key to success. Here are five tips to help you make the most of your grow bag garden:
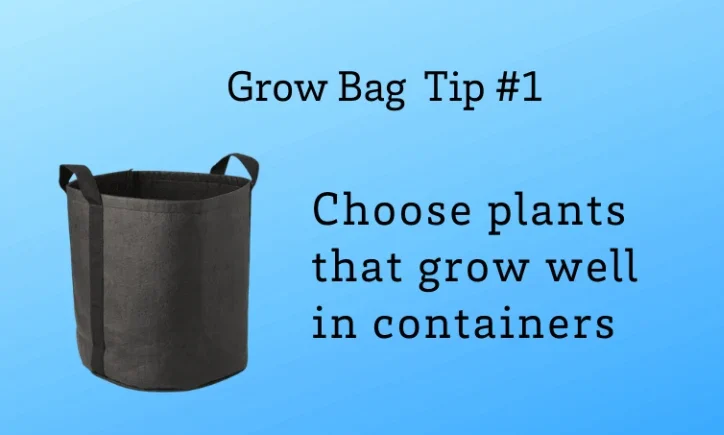
1. Select Suitable Plants:
Not all plants thrive in grow bags due to their limited root space and water availability. Opt for “dwarf” varieties or compact plants that perform well in confined environments. Look for bushy or compact varieties rather than vining types to ensure optimal growth and productivity.
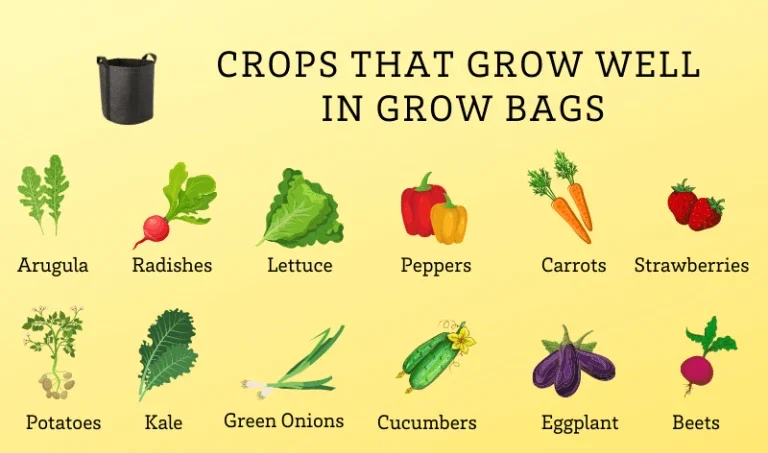
Ideal Crop Selection:
Certain crops excel in grow bags, making them perfect choices for your garden. Consider growing arugula, radishes, lettuce, peppers, carrots, strawberries, potatoes, kale, green onions, cucumbers, eggplant, and beets for a bountiful harvest.
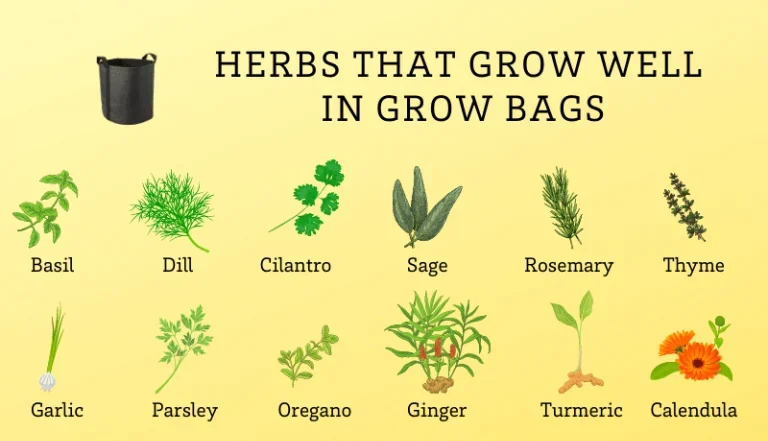
Herb Heaven:
Herbs are well-suited for grow bags, offering a convenient and accessible way to grow fresh flavors in your garden. Choose herbs like basil, dill, cilantro, sage, rosemary, thyme, garlic, parsley, oregano, ginger, turmeric, and calendula to elevate your culinary creations.
Optimal Plant Placement:
Ensure your grow bags receive adequate sunlight based on the requirements of the plants you’re growing. Place them in sunny spots for sun-loving crops or provide shade for those that prefer cooler conditions. Proper plant placement ensures healthy growth and abundant yields.
Careful Watering:
Given the limited water retention capacity of grow bags, it’s essential to water them regularly and monitor soil moisture levels. Avoid overwatering, which can lead to waterlogged roots, and aim for consistent moisture to keep your plants happy and hydrated.
By following these tips and selecting the right plants for your grow bags, you can create a thriving garden filled with fresh produce and aromatic herbs. With a little care and attention, your grow bag garden will flourish, providing you with a plentiful harvest season after season.
2. Use oyas or self-watering grow bags for thirsty plants
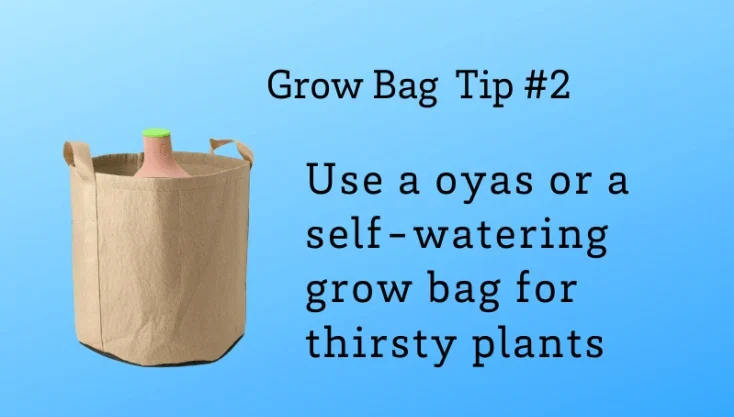
Maximizing Water Efficiency: Oyas and Self-Watering Grow Bags for Thirsty Plants
When it comes to grow bag gardening, ensuring your plants receive adequate water is essential for their health and productivity. For thirsty plants that require consistent moisture, consider using oyas or self-watering grow bags. Here’s why:
1. Oyas for Efficient Watering:
Oyas, or clay irrigation vessels, are an ancient yet effective method for watering plants. These porous clay cones slowly release water into the soil, providing a steady supply of moisture directly to the plant’s roots. By burying an oya in the soil of your grow bag, you can efficiently water thirsty plants like tomatoes, cucumbers, and peppers while minimizing water waste.
2. Self-Watering Grow Bags for Convenience:
Self-watering grow bags offer a modern solution to the challenge of maintaining soil moisture in grow bag gardens. These innovative bags feature a built-in reservoir at the base, allowing you to keep the reservoir filled with water. As the soil dries out, the plants can draw water from the reservoir through capillary action, ensuring they remain consistently hydrated. One example is the Titan Self-Watering Grow Bag & Trellis from Gardener’s Supply Company, which combines convenience with efficient watering for optimal plant growth.
By incorporating oyas or self-watering grow bags into your gardening routine, you can provide thirsty plants with the consistent moisture they need to thrive. Whether you opt for the traditional simplicity of oyas or the modern convenience of self-watering technology, your plants will thank you with healthy growth and abundant yields.

3. Choose the correct size grow bag
When it comes to choosing the perfect grow bag size for your plants, it’s essential to consider their spacing requirements. By referring to plant spacing guidelines, you can ensure that your plants have ample room to grow and thrive. Here’s a handy chart outlining the recommended grow bag sizes for common vegetables, fruits, and herbs:
By selecting the correct size grow bag for your plants, you can provide them with the space they need to develop healthy root systems and produce abundant yields. With this guide in hand, you’ll be well-equipped to make informed decisions and maximize the potential of your grow bag garden.
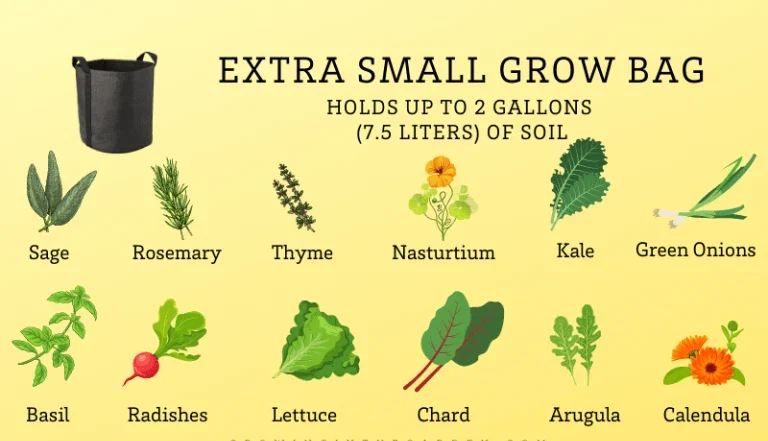
An extra-small grow bag, capable of holding up to 2 gallons or 7.5 liters of soil, proves to be an ideal option for various herbs like sage, rosemary, thyme, and basil. Additionally, this size of grow bag is suitable for many vegetables including kale, green onions, radishes, lettuce, chard, and arugula.
A small grow bag, capable of holding up to 3 gallons or 11 liters of soil, proves to be an excellent choice for various herbs like dill, cilantro, and parsley.
Moreover, this size of grow bag is suitable for many fruits and vegetables including kohlrabi, carrots, beets, strawberries, and celery.
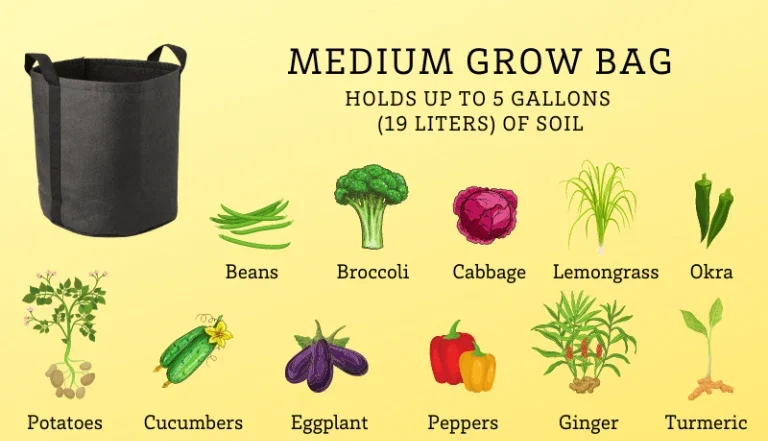
A medium-sized grow bag, capable of holding up to 5 gallons or 19 liters of soil, proves to be an excellent choice for various herbs like lemongrass, ginger, and turmeric.
Furthermore, this size of grow bag is suitable for many vegetables including beans, broccoli, cabbage, okra, potatoes, cucumbers, eggplant, and peppers.

A large grow bag, capable of holding up to 10 gallons or 38 liters of soil, proves to be an excellent choice for growing tomatoes and sweet potatoes.
If you’re using a grow bag larger than 10 gallons, that’s fantastic! They are well-suited for most types of vegetables and can often accommodate several different types in the same bag. Consider exploring companion planting for some ideas on maximizing your grow bag space.
4. Fill your grow bag with the best type of soil
The Key to Success: Choosing the Best Soil for Your Grow Bags
When it comes to grow bag gardening, selecting the right soil is essential for the health and vitality of your plants. Here are five tips to help you achieve success by filling your grow bags with the best type of soil:
1. Avoid Heavy Garden Soil:
Regular garden soil is too dense for grow bags and can become compacted, restricting root growth. Instead, opt for a lightweight and well-draining soil mix specifically formulated for container gardening.
2. Optimal Soil Composition:
The ideal soil mix for grow bags consists of a blend of compost, vermiculite, and coconut coir or peat moss. This combination provides essential nutrients, promotes proper drainage, and maintains optimal moisture levels for plant growth.
3. Choose Quality Potting Soil:
Look for bagged potting soil that contains a balanced combination of compost, vermiculite, and coconut coir or peat moss. Alternatively, you can create your own soil mix using these ingredients to ensure maximum quality and effectiveness.
4. Consider Specialized Soil Mixes:
Consider using specialized soil mixes designed specifically for raised beds, as they are well-suited for grow bag gardening as well. These mixes, like the Growing in the Garden Raised Bed mix from Arizona Worm Farm, offer the perfect balance of nutrients and structure for healthy plant growth.
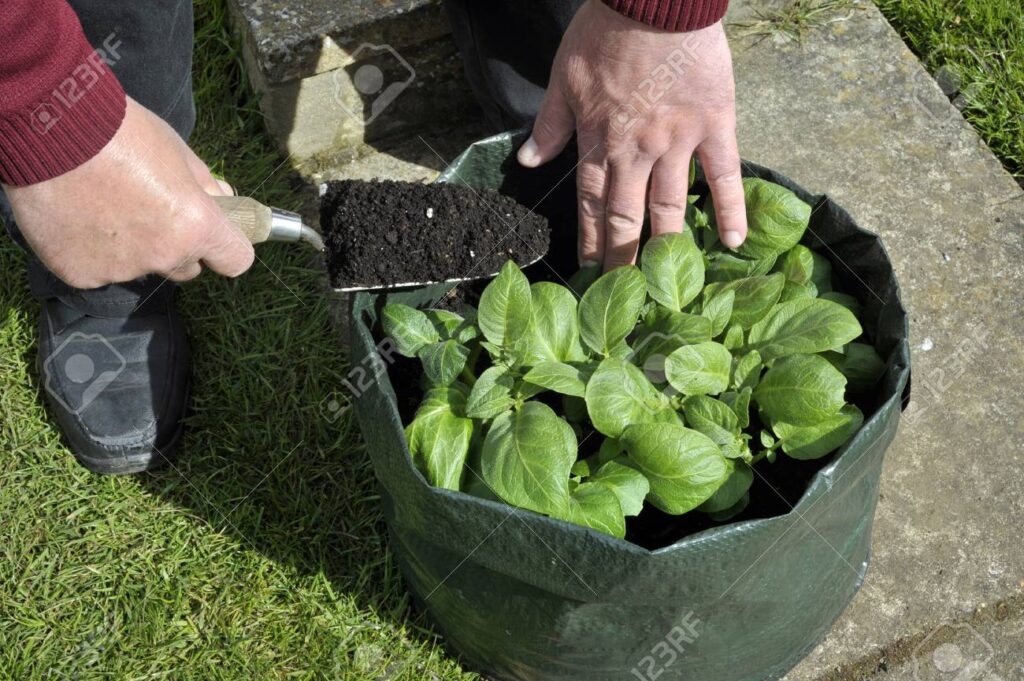
5. Fill Bags Completely:
Ensure that you fill your grow bags all the way to the top with soil to maximize the available growing space. This allows plants to establish robust root systems and access nutrients and water effectively.
By following these tips and choosing the best soil mix for your grow bags, you can create an optimal growing environment for your plants, ensuring they thrive and flourish throughout the growing season.
5. Put your grow bag in the best location

An important benefit of gardening in grow bags is the flexibility to position the bags in the optimal location based on sunlight exposure.
Most plants thrive when exposed to 6 to 8 hours of sunlight daily. Morning sun is particularly beneficial, with a bit of afternoon shade being ideal, especially in hotter climates.